
Soldering is the moment a pile of parts becomes a working device. It is also the moment most beginners wreck a board: a lifted pad, a bridge between two pins, a joint that looks fine under the lamp and fails intermittently a week later. None of that requires talent to avoid. It requires a sensible iron, decent ventilation, and a technique you can learn in an afternoon.
What follows is the setup and the habits that keep beginners out of trouble, plus what to do when a joint goes wrong anyway.
Pick an Iron You Won't Outgrow in a Month
The fixed-wattage pencil irons sold in hardware shops will do for a first through-hole kit, but not much more. They have no temperature control, so the tip sits wherever the heater settles — often too cold to flow solder quickly, which tempts you to hold it on the pad longer and cook the board.
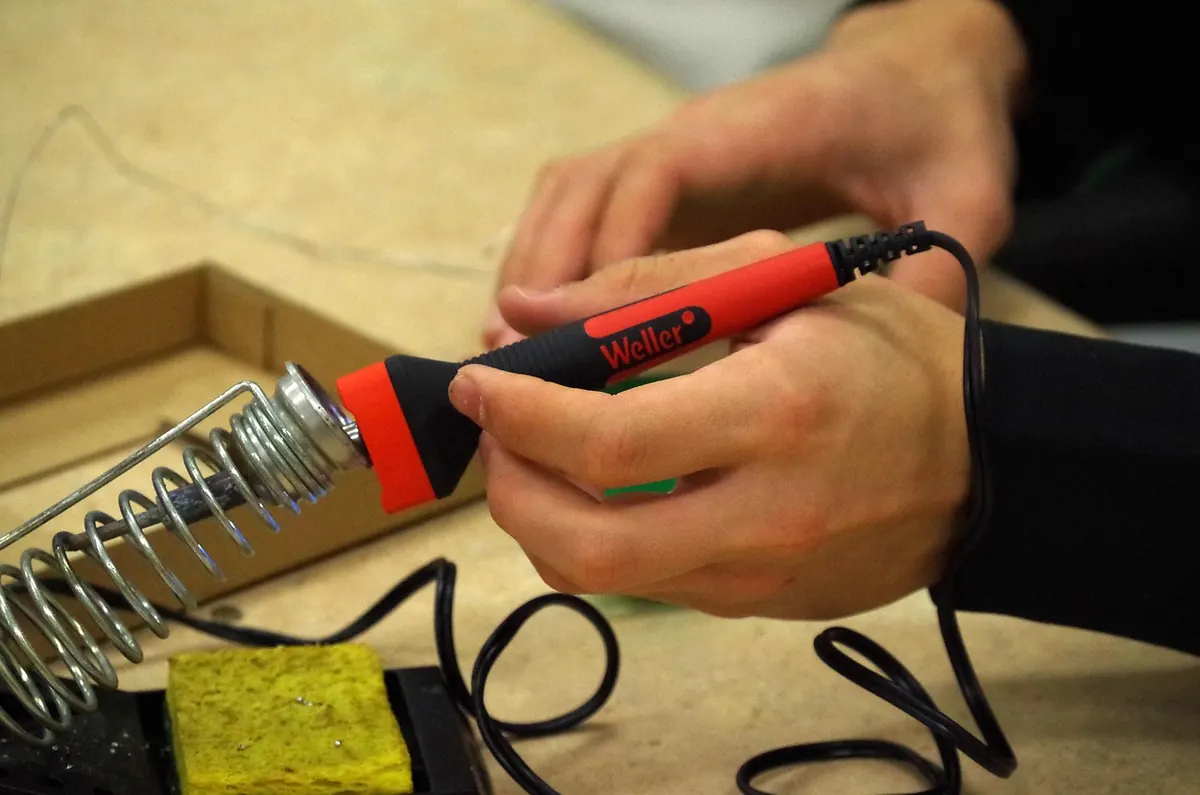
A temperature-controlled station is the sensible first purchase. Look for something in the 40–60W range with a ceramic heater, an adjustable dial or digital readout, and a tip that reaches working temperature in under a minute. Wattage matters less for maximum heat than for recovery: a hotter iron that stays hot when you touch it to a ground plane lets you finish a joint in two seconds instead of ten.
Tips and solder
Buy a chisel tip around 2–3mm wide for general through-hole work and a fine conical or bevel tip for small surface-mount parts. Tips are consumable, so treat them as such.
Solder comes in leaded (commonly 60/40 tin-lead) and lead-free (SAC) alloys. Leaded solder melts at a lower temperature and flows more forgivingly, which makes it easier to learn on. Lead-free needs a hotter iron and behaves a little differently, but it is what most commercial products use. Whichever you choose, wash your hands after handling solder and before eating.
Safety Gear and Habits That Actually Matter
The genuine risk in hobby soldering is not lead vapour — the iron never gets near hot enough to vaporise it. It is flux fumes, which irritate airways, and the simple fact of a 350°C metal rod sitting on your desk.
- Ventilation. Work near an open window, or use a small fume extractor with a carbon filter. If you solder daily or have asthma, get proper advice about the setup you need.
- Eye protection. Snipped component legs fly, and molten solder spits when it hits a wet sponge.
- A heatproof surface. A silicone mat or ceramic tile. Never solder on carpet or a bare wooden table.
- Always use the stand. Never rest a hot iron on the bench, even for a second.
- Tie hair back, roll up loose sleeves, and wear closed shoes. Molten solder burns through socks faster than you would like.
- Unplug and let it cool before putting anything away.
A helping-hands tool and a pair of silicone-tipped tweezers are worth the small outlay; they stop you holding components with your fingers while you aim an iron at them.
Set Up a Bench That Works
Good light beats every other upgrade. Add a magnifier if your eyes are anything like mine. Put the iron to your dominant side, the sponge or brass wool within reach, and keep components sorted into shallow trays so you are not hunting for a resistor while holding a hot iron.
For cleaning the tip, brass wool is gentler than a wet sponge, which thermally shocks the plating. Set your temperature by starting low — around 320–330°C for leaded solder, 350–370°C for lead-free — and raise it only if joints refuse to flow. A tip that is too hot oxidises, stops accepting solder, and burns flux before it can do its job.
The Joint Itself: Heat the Metal, Not the Solder
This is the one idea that fixes most beginner problems. You are not gluing parts together. You are heating the copper pad and the component lead until solder melts into them and forms a thin alloy layer. Solder applied to a cold pad sits on top like a bead of water on wax.
- Clean the pad and lead. Isopropyl alcohol and a light scrub remove oxidation and old flux.
- Touch the tip to the pad and the lead at the same time. Hold for about a second so both come up to temperature.
- Feed solder into the joint, not onto the iron. It should melt as it meets the heated metal, not the tip.
- Feed just enough. You want a small, concave fillet that wicks around the pad — not a fat ball.
- Remove the solder first, then the iron, and keep the joint still for a second while it sets.
- Inspect. A good joint is shiny and smooth, slightly concave, with the outline of the lead visible through it.
A through-hole joint should take two to four seconds start to finish. If you are counting to ten, your iron is too cold or your tip is too small for the job.
Fixing the Mistakes You Will Make
A cold joint — dull, grainy, blobby — happens when the metal moved or never got hot enough. Reheat it with a touch of fresh solder and flux. Adding more solder without more heat just makes a bigger cold joint.
A bridge between two adjacent pins is common on fine-pitch work. Add flux, lay the tip across both pins so the solder melts, then drag the tip away from the board. If that fails, solder wick or a desoldering pump will lift it cleanly.
A stray solder ball rolling across the board needs to come off, cooled, with tweezers. Check it has not lodged under a chip — a loose ball can short a circuit later when the board flexes.
A lifted pad, where copper has separated from the fibreglass, is the injury worth stopping for. Do not keep reheating it. Either solder to the next point along that trace or run a thin wire jumper. Then lower your iron temperature and work faster next time.
Sticky brown residue is burnt flux. Clean it with isopropyl alcohol and an old toothbrush. It is not only cosmetic; some fluxes are mildly conductive and can cause odd behaviour in sensitive circuits.
Keep the Tip Alive and Practise on Junk
Never file, sand or scrape a soldering tip, no matter how dirty it looks. Clean it with brass wool, re-tin it with a thin coat of solder before you switch the iron off, and dial the temperature down when you are not actively soldering. A tip that is pitted and refuses to hold solder is finished; replacements are inexpensive, so swap it rather than fighting it.
The fastest way to get good is to solder things that do not matter. Buy a cheap blinking-LED kit or salvage an old router from a recycling pile and practise desoldering its components — removing parts is harder than fitting them, and it trains your temperature control quickly. Work through a few boards like that, and the joints on your real project will stop being the part you worry about.
Photo: mkarasch0 / Pixabay